
To ensure the success of a Salesforce CPQ configuration project, I advise my customers to follow these 5 steps:
This involves a great deal of work in structuring your requirements even before launching your CPQ project, to make sure that the final document matches your vision – in particular your functional requirements, from language to contract and amendment management, not forgetting integrations with your software ecosystem.
The first step is to precisely define the attributes that characterize your products – and they’re not the same, depending on what you’re selling. This allows you to build your catalog according to these criteria and start importing files from Excel files.
For example, if I’m selling batteries, interesting attributes to remember might be battery life and weight. Whereas these same attributes are meaningless for another business. Salesforce CPQ provides numerous standard attributes, such as product family, product code (a must!) and description.
What’s more, depending on your interactions with the back office, you may need to multiply certain products.
For example, if you sell T-shirts, the customer needs to know the size and color: for you, these are simple indications in the quotation, but the back office will surely manage this with separate products – size, color, etc. – and the customer will need to know the size and color.
Another B2B example: I sell accounting services, in the form of 3 product families:
I also create package deals – for example, balance sheet + bookkeeping.
When setting up, it is imperative:
And all this, without ever asking the question of pricing, which we leave to a later stage (otherwise it adds too much complexity to this stage and risks derailing the project).
The next step is to create product attributes. How do I define attributes? These are fields that you create at product level for various reasons:
For example, if you need to calculate the cost of shipment by post, it’s a good idea to add a “Weight (Kg)” field to the product object, so you can calculate the total weight to be delivered.
Another example: if a certain number of products must trigger the addition of a clause in the quotation sent to the customer. To do this, simply add a checkbox to the products concerned.
Your sales reps need clear screens to help them build a quote as quickly and easily as possible.
Here are the main screens to consider:
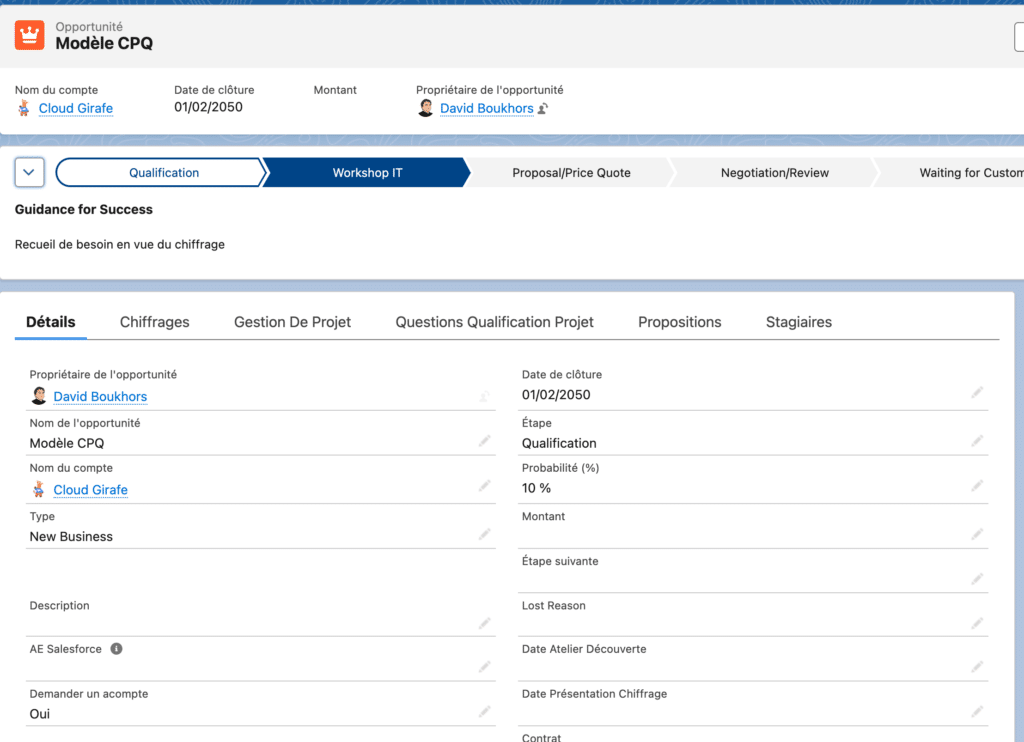
The Salesforce opportunity screen: it’s often forgotten, but it’s bound to be impacted by the arrival of CPQ. Certain fields become necessary, such as the contact to whom the quotation is addressed, the service start date, the ARR, etc. Sometimes you’ll even need to add new statuses such as “quotation in the process of approval”, “quotation sent”, etc.
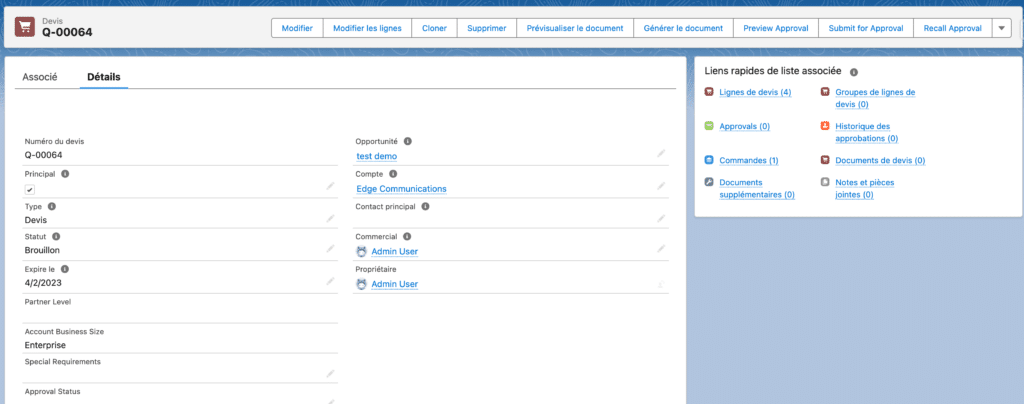
Salesforce quotation screen: this screen displays the basic quotation data and allows you to enter the CPQ screens, or generate a PDF quotation for the customer.
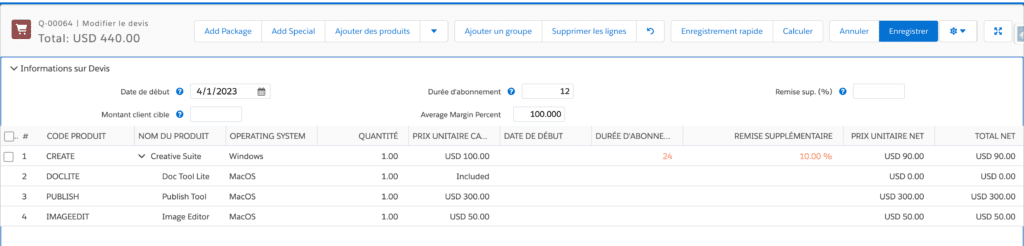
The Quote Line Editor (QLE) screen: this is the most important CPQ screen. It displays all the products in the quote, along with their quantity, list price and sales price. The screen lets you add products from the chosen catalog, and display interesting aggregate fields (service family total, total discount amount, stock to insure, etc.).
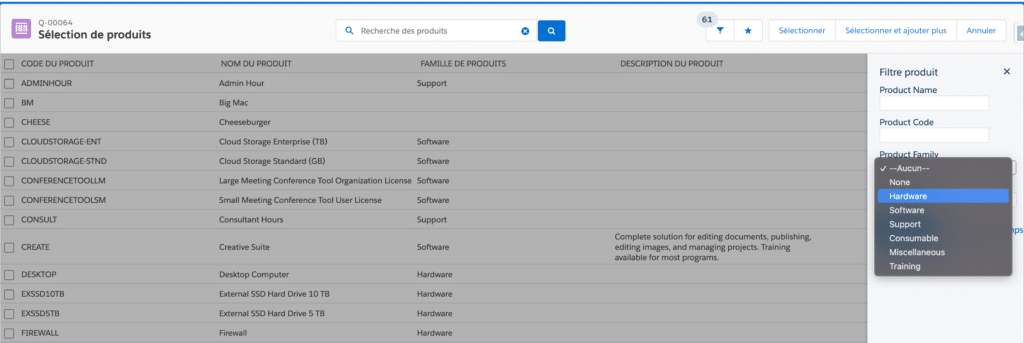
Product selection screen: allows you to choose the products you want. Note that you can create “Custom Action” buttons, allowing you to pre-filter by family, or by other selection criteria. You can quickly select a product based on its product code, name, etc.
The configuration screen: this is where you configure your bundles. It allows you to choose the options included in your offer. Your CPQ administrator can make data entry easier for you, by applying compatibility rules, exclusion rules and automatic entries according to your choices.

Salesforce CPQ guided-selling is a powerful tool that will enable your salespeople (even beginners) to ask your prospects the right questions, and deliver an optimized quote in no time. Custom actions” enable your sales staff to quickly select products by family, while “product rules” allow them to automatically add essential products to the quote. (warranty, transport costs, insurance, etc.).
You will now define one by one all the values to be calculated:
Something to keep in mind
It’s imperative to follow this step only after you’ve ensured that all products are well constructed and that nothing is missing. At the risk of having to start from scratch.
CPQ features a powerful calculation engine. You can, of course, calculate a total VAT amount, the total weight of items, and sum, subtract, divide and multiply all available information.
Here’s a concrete example: if I’m selling computer hardware and wifi routers, with one router capable of supporting 6 connections, I can automatically calculate the number of routers required based on the other elements of the quote.
Even better! I can also rely on previous purchases. This also applies to the calculation of discounts. I can therefore offer a discount based on the quantity purchased in this quotation, but also on quantities already purchased in the past.
Now it’s a question of control, by setting up the Approval Process, which will be triggered under certain conditions. The principle is simple: your sales representative needs to obtain validation before sending the quote to the customer.
Here are 3 classic examples of approval:
To easily set up this approval, I recommend that you draw up a table of all possible cases beforehand.
Something to keep in mind
Make sure you cover all possible cases, and avoid redundancy.
And if Sales Cloud’s standard approval engine doesn’t suit you, you can opt for Advanced Approval.
Salesforce’s Advanced Approval is a (really) powerful tool that allows you to go much further, using more intelligent mechanisms:
Once your CPQ is ready for your sales force, all that’s left to do is build the template for your quotations. Above all, remember that your customers will only have access to your quotation in PDF format.
So it’s all the more important to make it pleasant to read, and above all with all the useful information. Here are a few examples of essential elements to include in your quotation:
If your quote is dynamic, build smart! Instead of creating a new quotation template for each situation, consider creating quotations with dynamic sections based on certain criteria. Administrators who have to maintain and upgrade your quotation templates will be delighted!
A warning that may seem obvious but is essential: before starting a CPQ project, make sure that your catalog is up to date and that you don’t intend to modify it immediately.
I have an example of a customer who launches a CPQ project in September, knowing that he’ll be changing his catalog in January. He takes the risk of having to redo everything, and derail the whole project.
The principle of a CPQ project is that there really is an order to it:
C = Configure. Make sure you know how to build your offers in the tool, with consistent options, and automatic option additions. For example, automatic shipping costs based on item weight.
P = Price. Above all, don’t start this stage too early! If the product is not configured correctly, do not attempt to calculate a price.
This section includes discounts. CPQ offers System discounts (for example, automatic discounts when a certain quantity is taken, or according to a framework agreement with the customer), and discretionary discounts, entered by the salesperson.
Q = Quote, the document you send to the customer.
Namely: in the Anglo-Saxon model, a quotation doesn’t have to be beautiful, it just has to be formal. Whereas in France, we pay particular attention to the document to be signed by the customer. That’s why it’s not uncommon to use tools such as Conga Composer or Docusign Gen to complement CPQ.
The CPQ offer includes Docusign Gen or Conga Composer in the license.
Remember to use tables/objects alongside CPQ.
For example, to manage a promotional code, create an independent table with the following information:
This means that the person in charge of promos doesn’t need a CPQ license, and can handle this part without the need for CPQ training.
Avoid putting too many “hard” rules in the tool. It’s better to think in more general terms and make things more variable. It’s the same for calculating salespeople’s bonuses: it’s better to create a table containing the rules.
Your company’s list of functional requirements can be titanic. Be careful to prioritize your needs so as to respect those with the highest added value.
The costs and effort involved in implementing a CPQ project increase considerably if all the “out-of-the-box” functionality has to be customized. My advice is to get a feel for CPQ solutions first, using standard features and workflows.
To define your list of functional requirements,
CPQ supports all Salesforce languages and multi-currency. To manage the use of several languages at once, CPQ uses a very powerful “Localization” object.
It goes further than the standard Salesforce translation. Here you can translate any text field present on the product object. In other words, the same product could be called Mouse in English, and Souris in French. Multilingualism affects not only the end customer who signs the quotation, but also your sales rep who uses CPQ.
This allows you to sell products in any language, which is very useful if your company has acquired a foreign company.
Multi-currency operation is identical to the Salesforce standard. You choose a main currency for your environment. All reports can aggregate data in this currency. You define the exchange rates, either annually or over defined periods. You can even use third-party tools to automatically fill in exchange rates.
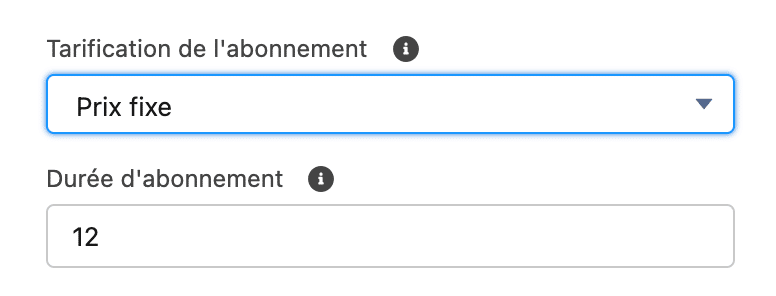
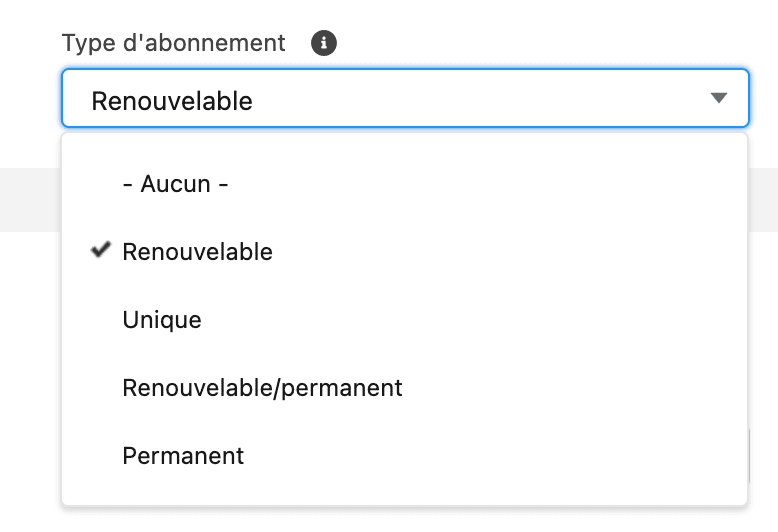
To manage subscriptions and renewals, the first step is to clearly define the management rules.
The capital fields for defining a subscription are located on the product object:
This field defines whether the subscription appears again on renewal. For example, you could offer a subscription valid for the first year to support new customers.
You can also use the Permanent (Evergreen) type. In this case, the subscription is tacitly renewed. In this case, it’s best to agree on a process for checking the notice period to be applied when terminating the contract.
CPQ integrates contract and amendment management, and above all gives you a clear process for managing them.
A rider is a modification to a subscription during the life of the contract. For example, an upgrade, an increase in quantity, a reduction in commitment, the addition of options, etc.
I often see that my customers don’t have a real process for managing endorsements before CPQ arrives.
The main principles:
The next step is to open up CPQ to partners, so that they can produce complex quotations and save you considerable time. To use this feature, you’ll need Experience Cloud licenses in addition to CPQ+ licenses.
No more e-mail exchanges and reference discrepancies! What’s more, the partner will be able to see his margin more quickly, as well as the customer’s existing fleet (if you give him access).
In order to control discounts, we recommend you add an approval process so that verification and discounts remain in your hands.
In my opinion, there are two key integrations with your software ecosystem:
Inventory and capacity management is a common request, for which we can turn to tools such as the French monstock or the American topShelf.
We’ve already integrated a number of tools. You can use the standard Revenue Cloud or connect your Salesforce to any system. Prerequisites: an API and comprehensive documentation. In general, we work on a “mapping” basis, i.e. you provide us with screenshots of Salesforce and the target tool, specifying that such and such a field goes into such and such a field, and so on.